Winter work
It's that wonderful time in winter when you take a perfectly good bike to bits to see what isn't so perfectly good anymore.
This wont be blow by blow break down and rebuild, that would be boring. This will be a few key points of interest and the odd finds along the way. You can tell I was excited to write this one as I managed to forget I had started it at the beginning of the season and just found it this December. At least I got it done before the year was up!
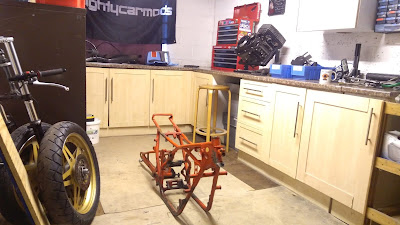
I had thought about powder coating the chassis but didn't fancy the expense or weight so I went with paint instead.
Halfords tool box red is cheap and the colour is about perfect for what I wanted. After a little bit of tidying up including lower engine mount bracket removal and he odd weld I was ready to get things sanded back for paint. A couple of cans of Halfords finest later I had a fully painted engine and chassis with some thick clear tape used here and there for protection during engine fit and tank rub areas.
Frame
The bike doesn't need a complete strip down every year. An engine strip down and general poke about would suffice normally but the frame needed painting so everything was coming apart.I had thought about powder coating the chassis but didn't fancy the expense or weight so I went with paint instead.
Halfords tool box red is cheap and the colour is about perfect for what I wanted. After a little bit of tidying up including lower engine mount bracket removal and he odd weld I was ready to get things sanded back for paint. A couple of cans of Halfords finest later I had a fully painted engine and chassis with some thick clear tape used here and there for protection during engine fit and tank rub areas.
Engine
 The bike had lost power on the last race of the year at Cadwell so I was interested to see if there were any issues with my engine that needed sorting.
As it happened, the crank had spun a bearing which had destroyed its half ring in the process.
Yer that will do it!
I looked at machining it or finding some other repair but it was just easier to replace the whole thing and worry about this set of casings another time.
 Another hidden victim was this clutch return spring which had almost completely worn through.
You will see some fiddling and faffing coming up in a moment but as it later turns out I ended up using this for another full season and it hasn't died yet. Lets see if it will do another decade.
Yer that will do it!
I looked at machining it or finding some other repair but it was just easier to replace the whole thing and worry about this set of casings another time.
 Another hidden victim was this clutch return spring which had almost completely worn through.
You will see some fiddling and faffing coming up in a moment but as it later turns out I ended up using this for another full season and it hasn't died yet. Lets see if it will do another decade.

After some eBaying I had another set of cases in hand which arrived as a part built engine(so some helpful spares) which I stripped and made one good one out of all of the bits.
The new engine was pretty good but a bit of a clean was always going to be needed to make sure I didn't get any disasters this season.

 Reassembled with bungs stuck in where I didn't want anything to leak out and showing off it's "special" stud, the new cases were pretty much ready to go pretty quickly.
This one came with the correct oil deflector but I opted not to use the air cooled style bracket behind the clutch basket as this had caused me some problems previously with it not completely lining up.
That aside I didn't change a lot more that I can remember. The clutch is the LC version. This was only because it was less fucked than the three air cooled clutch baskets I had on the shelf.
 The only down side of this arrangement is there is quite a bit of back lash between the output gear and clutch as the cut is different.
This doesn't cause a huge problem when racing as there is always a positive drive on these gears but if you rock the engines drive you can hear it clunking away. I should really get a new output gear. Another day maybe, it works.
 The new engine came with an LC generator cover which needed a tidy up as the top mount was made from filler which came straight off the second I looked at it.
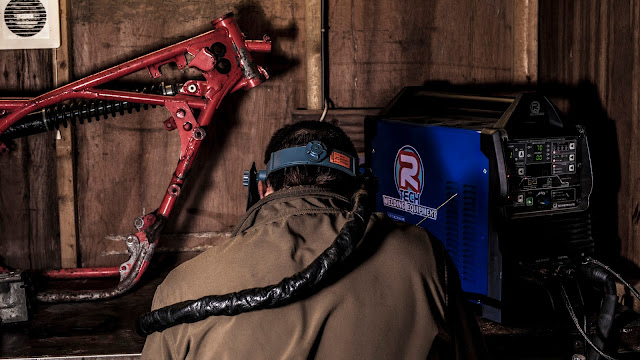
I built up as new one using my R-tech digital tig 170 which as you can see looked good enough already but just to be sure I drilled the hole out to actually take a bolt and then tidied the whole lot up with a dremmel.

This took a little while but I was pretty happy with my efforts.
After a bit of paint the panel looked as good as new.
I hoped this one would suffer less with cracking compared to the one I was currently running and it also had the rubber flap on the back side (sorry not pictured) which prevented the chain throwing crap all over the engine.
I'm sure you can imagine how pissed off I was when I couldn't fit the sodding engine with the cover fitted. I just wouldn't fit in the slender TZ chassis so I had to revert to my beaten up aircooled cover instead. Oh well onto eBay the LC cover went.
Things were starting to come together now as the rebuid continued.
Some nice Racing Green forks there, very fancy.
The exhausts needed repacking as I was pretty close on noise testing a few times in 2018.
The old packing didn't look terrible but was packed too tightly to rally knock the noise down sufficiently.
 Whilst I was there I took the opportunity to "rebuild" the corner of the right can which I had been gradually grinding away due to extreme lean angles and more to do with a poorly mounted exhaust.
 This went surprisingly well with me not blowing any holes in the thin can and building up a good layer of ally for future grinding.
A bit of grinding back and polishing later made it took a bit more presentable and less like a barnacle.
I had no intention of getting it perfect as I was pretty likely to grind the whole lot back off again the next time I rode it.

Another bit that needed sorting was the front fairing stay.
When I transferred this from the RD chassis to the TZ, I had tried to build a weld bead round it which I made a complete pigs ear of. As a result it sat wonkilly and was generally unsightly (not that you could see it inside the TZ chassis but I knew!). A pice of steel tube was beaten onto the end of the stay which had been ground down to a taper then welded.
 This gave the step up needed for the RD's front fairing stay and saved me making a completely new bracket.
On the plus side it helps get the weight over the front wheel.
 I'm not sure what is happening in this picture.
It is either the bike pissed oil everywhere during the night due to a casing leak caused by a mismatched clutch cover (I thought that happened the year before) or I had forgotten something so had to tip the bike on its side to get to the clutch casing side for something else.
I'm sure I had a funny anecdote but you are just going to have to miss out on that one.
Once all was built; the bike was fired up which it did quickly. The clutch however was less cooperative letting the bike fire me into the garden gate with the front wheel skidding in the gravel as I tried to stop it.
Note to self, work some oil onto those clutch plates next time.

 |
| Doesn't it look clean at the start of the season. |


Comments
Post a Comment