Posts

Showing posts with the label fabricating

Getting really Forking fancy

Image
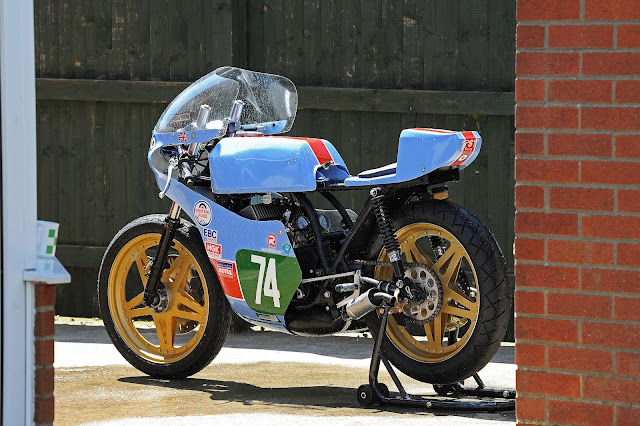
 When the front wheel is on the ground, I really didn't have too much trouble with the front end on the RD/TZ thing I was riding. The huge gun sight tubes sticking out of the headstock however were a little unsightly though so off I went to Classic Racing Green to see what he could do for me. Andy had talked about chopping my forks before but when I saw him this time he made short work of convincing me to upgrade the internals whilst I was there with top notch K-tech parts. The forks I have fitted to my RD are from a Yamaha FZR400 1WG. K-tech don't do an off the shelf set of cartridges for them but after a fair bit of measuring, Andy was able to specify and demand all the parts he needed to make them. Whilst we were there some fixed rate springs were ordered rather than cutting down my progressive springs and Andy's signature classic look top nuts were also made specially for these 38mm forks.  The parts took a couple of weeks to come together so whilst we wait...
Stay now

Image
 Post Mallory park, I had a problem: The bike hadn't broken and I didn't know what to do with myself... ...Time to sort out some of those little niggles.  One of those little niggles was the rear fairing stays. Apart from being a ticking time bomb of fragility, they also get right in the way of my knees. As a result the fairing was starting to suffer and I was constantly conscious that I might knock one off, ending my racing weekend. I decided to copy a bracket idea I had seen on another bike using some 12mm steel bar and 20mm box section. Ideally I have used tube but nobody local to me stock any and I wasn't going to wait for a delivery. The bar was cut to length, drilled on either end and tapped for an M6 bolt. I made sure to drill as deep as the bit would allow in order to reduce weight as best I could. This bracket was going to be a lot heavier than what I was replacing. The bar was test fitted and markings were taken for where the box section arms ...

Exhausting work

Image
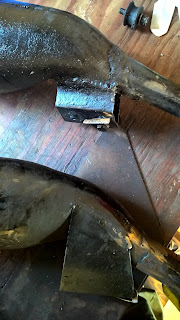
As things continuously vibrate themselves off my bike it was clearly time for my exhaust to drop off.  Which it did.  The plan During my one and only full trip round Pembry race circuit in Wales my left exhaust bracket cracked through as you can see on the right. Thankfully my fairing caught the exhaust resulting in little damage and a functional machine so no major problems there. Now back home and post some discussion with Andy Green; I had decided to make new mounts that should survive a little better than what I had. The straps on the pipes were something the previous owner had used and I had cobbled some sheet and rubber spacers together to marry them up to my frame. The solution proposed to me was to use tubular engine mount bushings in some steel tube that would be welded to my frame. The exhaust would then marry up to these bushes via some split box section . The box section would be welded to the pipe via a stress spreading sheet that would be we...

Bits and bobs

Image
There is no shortage of little bits and bobs to do. Some are new, far too many are bits that dropped off or misbehave. Bobbins and friends Rear paddock stand bobbins have been sat in my RD250 parts box for a few months. I just didn't fancy welding nuts to my swing arm that was all. But I finally got that low on jobs and that fed up with the damage I was doing to my new shock bottoms, I ended up deciding to fit them. A suitable position was found and marked on the swing arm so I knew where the nuts would need to be welded on. To weld these nuts on I had to remove all of my electrics or remove my swing arm. So off came my swing arm, a surprisingly easy job to do. With the swing arm on my bench: I removed paint from the area I would weld and carefully tiged the nuts on. I had to take care as the nut would happily melt at 20 Amps but the swing arm needed more like 60. As such I heated the swing arm and carefully rocked up to the nut working plenty of rod in to real...

Tacho, tacho

Image
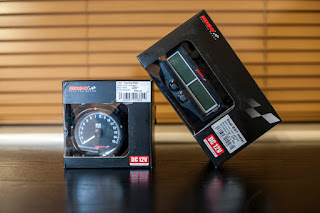
Knowing what is going on with your engine is useful to know for diagnosis purposes as well as for how hard you can get away with pushing it on the track. With the addition of these new Koso EGT, tacho and a pair of TTO cylinder head temperature gauges, I will be well in the know at all times! *Spoiler*  By all means read this blog, it is interesting after all (I hope), but I wouldn't plan a build of your own based too closely on this bracket design. Maybe try this on . Mounting Much time was spent offering up different gauges in a variety of configurations to see what would work best, not only to look good, but to fit in the space I have available and present the information to me in a simple easy to read manner. All very important when buzzing round the track like a loon. I decided early on that I wanted all of the gauge faces on the same level. This would be tricky as each gauge was of a different depth. I decided to try making a backing plate out of thin sheet...