Posts

Showing posts with the label air

Winter work

Image
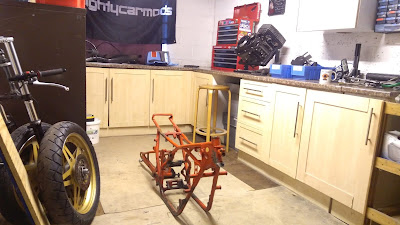
It's that wonderful time in winter when you take a perfectly good bike to bits to see what isn't so perfectly good anymore. This wont be blow by blow break down and rebuild, that would be boring. This will be a few key points of interest and the odd finds along the way. You can tell I was excited to write this one as I managed to forget I had started it at the beginning of the season and just found it this December. At least I got it done before the year was up! Frame The bike doesn't need a complete strip down every year. An engine strip down and general poke about would suffice normally but the frame needed painting so everything was coming apart. I had thought about powder coating the chassis but didn't fancy the expense or weight so I went with paint instead. Halfords tool box red is cheap and the colour is about perfect for what I wanted. After a little bit of tidying up including lower engine mount bracket removal and he odd weld I was ready to get...

Getting really Forking fancy

Image
 When the front wheel is on the ground, I really didn't have too much trouble with the front end on the RD/TZ thing I was riding. The huge gun sight tubes sticking out of the headstock however were a little unsightly though so off I went to Classic Racing Green to see what he could do for me. Andy had talked about chopping my forks before but when I saw him this time he made short work of convincing me to upgrade the internals whilst I was there with top notch K-tech parts. The forks I have fitted to my RD are from a Yamaha FZR400 1WG. K-tech don't do an off the shelf set of cartridges for them but after a fair bit of measuring, Andy was able to specify and demand all the parts he needed to make them. Whilst we were there some fixed rate springs were ordered rather than cutting down my progressive springs and Andy's signature classic look top nuts were also made specially for these 38mm forks.  The parts took a couple of weeks to come together so whilst we wait...

testing tyre walls

Image
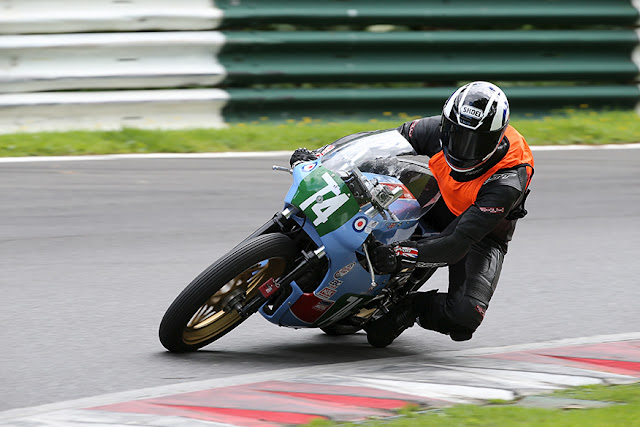
Cadwell was going quite well till race three where I decided to use a tyre wall to retard my progress off the exit of the hair pin... I did get to watch the rest of the race from the side lines and collect my thoughts which were rattling around the inside of my now distroyed Shoei NXR helmet. Not long later I was in the back of one van heading back to the pits then another home to fix the bike and my pride. What broke? Aside from collecting a lot of Cadwell parks grass and soil in my fairing, things were not looking too bad considering. My screen had exploded which was a given and the throttle cables were split open and bent round although not severed. The rear fairing stay had punched through the fairing in a neat round circle which meant the fairing got out of the way whilst the bike slid which saved the paint and only needed a simple repair. The only other thing to really touch down was the end can which was now quite...

Bits and bobs

Image
There is no shortage of little bits and bobs to do. Some are new, far too many are bits that dropped off or misbehave. Bobbins and friends Rear paddock stand bobbins have been sat in my RD250 parts box for a few months. I just didn't fancy welding nuts to my swing arm that was all. But I finally got that low on jobs and that fed up with the damage I was doing to my new shock bottoms, I ended up deciding to fit them. A suitable position was found and marked on the swing arm so I knew where the nuts would need to be welded on. To weld these nuts on I had to remove all of my electrics or remove my swing arm. So off came my swing arm, a surprisingly easy job to do. With the swing arm on my bench: I removed paint from the area I would weld and carefully tiged the nuts on. I had to take care as the nut would happily melt at 20 Amps but the swing arm needed more like 60. As such I heated the swing arm and carefully rocked up to the nut working plenty of rod in to real...

Going back to ignition

Image
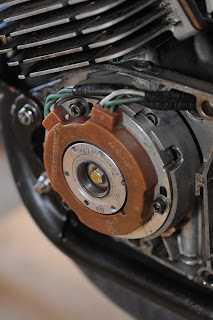
Two things happened: My ignition didn't want to talk to my tachometer, Then my ignition decided to remove itself from my bike altogether, It was time for a new ignition. After the last round at Snetterton when the bracket you see on the left decided to suck and fall of, I was facing the dilemma of: Fix it with a new (and stronger) bracket, or replace the ignition system all together. Fixing would be fairly easy, I like the Femsa ignition for its classic design, very strong spark and so far reliability. But what if this happened again? The Femsa is old so how long could I expect it to last for anyway? And I'd like that shiny new tacho to work, which it didn't with the Femsa ignition? Well I did want a working tacho and took this as an opportunity to upgrade.  A couple of days later I was a few hundred quid lighter and had a new hpi ignition to play with. Everything was less bulky and obviously separate; so more like a modern bik...