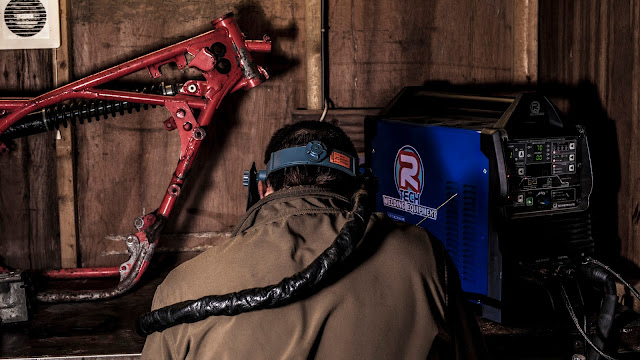
Engine remove, strip, rebuild, fit, repeat...
This bike isn't going anywhere [fast] without an engine rebuild so in I went with a Haynes manual and a can of WD40.
Before we get to into this: For those who don't know me this is not a step by step guide on how to strip and rebuild an engine. It is more a ramble about stuff I did interspersed with pictures. It is meant to be entertaining as well as filling in the gaps those hazy grey areas in the manual like to leave. f you want a step by step guide; go buy a manual.
Stage one was to attack everything with the can of WD40 and stick the engine on my work bench (it was loose in the frame anyway. The next step was to close up the garage and go drink tea and play forza till I got good at racing (never happened).

With a night to soak, things were a fair bit easier with no rounding off bolts which makes a pleasant change.
The heads and barrels are held on by some funky bolts and nuts respectively. Remove these in a pattern that doesn't stress things out then pop the heads and barrels off whilst supporting the pistons so they don't impact the case.
Point to note, you can remove the barrels and heads together should you wish, just pop the spark plug out to make life easier.
The pistons are held in by a pair of C clips. Pop one out with long nose pliers and a small flat blade screwdriver then slide out the pin. If you are not planning to split the case I'd pack out any holes just in case that C clip escapes in search of a dark new home. It always chooses the crank case every time. I removed the pistons a bit later but up to you when depending on what you are trying to do.
Removal of accessories like stuffer blocks, oil pump are easier sooner rather than later ( I left stuffer block till later and this made things trickier than it had to be) so naturally I removed thing as they got in the way. Next off came the engine casings remembering that left is nice and dry save for some chain oil goo and right will empty the sump down your trousers so do it over a bucket or take the sump plug out first. The oil pump is in the way of this one so hoy him in the bin if you haven't already.
Now I was down to the main body of the engine I had to removed all of the bolts holding the engine together. First off come the heads and barrels which I removed earlier followed by the case bolts which are numbered so just loosen then undo them in reverse order. Note that there are bolts on the top and bottom of the case, they are different lengths and some have fun clips so you might want to take pictures of what went where or label everything. These bolts came off with little difficulty thanks to some lube the day before but a little heat and some light impact helped where resistance was met.

Remove the pressure plate screws being sure to spread the load evenly as you do so. with this off slide the plates out, keeping them in order should you wish to reuse them.
Now you can get at the clutch basket bolt which you can remove with the assistance of a clutch basket tool.
You can now get at the crank output gear retaining nut. You will need to lock the crank using a long extension bar through the conrods supported on wooden blocks. I'm not entirely sure why you cant undo this with the basket in and use a basket tool but that's what the manual says to do.
 The only thing holding your cases together now are the kick start spring, oil guide and input shaft bearing retainer which you can see on the right. Take note that most of these components are held in with cross point machine screws. Only use a high quality 2 bit cross point and not a philips as you will damage them otherwise. I used bits from an impact driver which did a great job.
Now lightly tap (beat till it nearly breaks) the casing edges to free them up allowing you to lift the top off.
Tadaaa your engine is now stripped, mostly.

What to do now it is in bits
I pulled the gears out and inspected them which I found were basically as new. I pulled the crank out which was a C/D/E crank and put it to one side as I had a completely rebuilt A/B crank with TZ con rods and RG500 bearings ready to drop in.
 With the cases now empty I stuck them in the dish washer.
Yup you read that right.
Dishwashers are great at removing grease deposits and the bottom of my engine casings were coated in gunge. After a couple of cycles of the dishwasher treatment I gave the top and bottom a quick sand blast, being careful not to get an machined surfaces then gave them another wash before giving them a final clean with carb cleaner and bushes then setting them aside.
One thing with dishwashers is that they use salt as an abrasive so make sure the cases get well rinsed afterwards or things get furry fast!
Aside from a clean up and inspect there isn't a lot to do with the engine cases apart that is worth mentioning here. I had a long wait between strip and rebuild as I had to port, sand blast and skim my barrels along with much other faffing. More on some of the other bits another time but for now we will get into rebuilding.
Rebuild
Rebuilding is the reverse of removal as the Haynes manual would like to tell you.
First up make sure everything is spotlessly clean. I used a degreasing bath and really went to town on the casings.
With everything clean and dry the rebuild is really straightforward with a few noteworthy bits.
The gear shafts slot back in and with a bit of messing around with the selector forks. You can test it out with the cases apart to be sure you got it right.
the crank drops in taking note of the pin positions on the bearings then tapping it all home. Lube everything up with gear oil at the back and the same 2T you intend to use in the front before sticking a small bead of instant gasket on the casing half and sticking the top back on.
Tighten the bolts in order ensuring the crank pins haven't moved indicated by the front of the cases not closing properly. now stick the wet side of the engine together again with plates, gears and the clutch.

I stuck a new set of clutch friction plates and springs for a YPVS in as a friend had them going spare. This later proved to be a problem as the springs are far too hard but the plates are fine but more on that another time.
When rebuilding the clutch there are two thrust washers that go either side of the basket. I lost one in my van and was quite confused when it came to rebuild time but thankfully I found it before I just assumed it didn't have one or something equally as daft.
 Very quickly I had a fairly right looking engine. Putting the top on is no big deal at all so if you are this far pat yourself on the back, you are nearly done.
Now get stuffing cavities with tissue.
No not those cavities...

 As I wasn't planning on using the oil pump, I stuck a blank on the casing, made sure everything had a little lube on it and refitted the wet side case with a nice new gasket if only to protect this side of the engine during the next bit.
  The ignition system now pops on the other side.
I am using a Femsatronic racing ignition rather than a road going generator and ignition system.
The flywheel for this ignition sits inside the windings using a woodruff key for correct location.
When you come to tightening yours down, for the love of god don't torque it down to the same torque figure as the road going ignition!

Or, alternatively, like me, you can over torque and snap the fandango M7 bolt and waste hours trying and failing to drill the bugger out.
As you can see mine snapped below the surface and after a fair bit of trying I ran out of time and gave in, swapping the crank for a mates spare.
What a knob.
Yer that involves splitting the cases and starting over again. *sigh*

With paper stuffed in the crank casing, I fitted the new pistons that were matched to my re-bored barrels. I always fit one C clip first on the inside with the piston loose, leaving me the outside C clip to fit with the piston on the engine. This further reduces the chance of an escapee C clip. I also fit the piston rings off engine for the same reason.
Before sliding in the piston pin I make sure the small end bearing and pin are both lubed nicely with 2T oil and the piston is on the right side and right way round.
Pop on some gaskets and then find your nicely bored, sand blasted and ported barrels.
Now with a lubed up piston and barrel I slid the barrel on whilst pinching the piston rings closed against their guide pins.
If you didn't remove the paper towel from your crank case before doing this then commence swearing now.
With the barrels on you can stick the heads on and bolt it all down. with the help of a torque wrench and your trusty Haynes manual.
 Ignition setup is very simple when you just stick the bolts in the same place the last guy had them. I checked mine and with the cut outs (4 o'clock) lined up my piston had dropped 1.25mm which is what I wanted.
That last dude clearly knew what he was doing.
I found the outside of a flywheel puller was a great tool to fine adjust the position of the crank whilst checking this rather than trying to turn the engine over with the rear wheel.
That's basically it. I'm sure I did some other little things here and there but this is wordy enough already.
I would strongly recommend using a Haynes manual as a reference and having a good think whenever you find yourself using parts that came from other manufacturers.
This engine is for racing so has a few bits you might not otherwise see on a normal RD250. It is also for me so it is a long way off of being a professional race bike or a show piece but it did what it was supposed to and helped earn me points on the bikes first outing so I must have done something right.


Comments
Post a Comment