Posts

Showing posts from April, 2017

Fault diagnosis. II

Image
It couldn't be simple could it? Following on from Fault Diagnosis I (FD I), we have that other fault to figure out. I have left in the symptoms (in Italics ) that built up to this fault coming about as it paints the picture for how we went about investigating this fault. You should know the cause of FD I so try and find what caused the next snag. Symptoms The bike was on the dyno the day before having recently had a new ignition fitted and was running well with good power and safe temperatures. Engine started well on choke. In the waiting area for the Pembrey practice session; the bikes tick over was noticeably high with the right cylinder temperature climbing at a much higher rate to the left. Right pipe was running smokier than the left  which would seem to balance somewhat when revved. During riding temperatures rose to near correct running temperature with left reading slightly lower at 138/149 max.  Power delivery was very lumpy, bike seemed much happier w
Find that fault. I

Image
This is the first in what will no doubt be a series of fun fault finding exercises. I will present information to you as I found it then talk through my process of elimination to find the fault. I'm hoping these will be useful in helping you recognise a problem with your bike better through the faults I have come up against. Some of these faults are very complicated and have multiple answers. In these circumstances I try to separate them where suitable. However as these things do sometimes come along in a group of problems; be prepared for less than straight forward answers. So knowing I am riding a mildly tuned RD250 E with VM32 carbs TZ250 G expansion chambers and an electronic ignition system lets have a look. Symptoms The bike was on the dyno the day before having recently had a new ignition fitted and was running well with good power and safe temperatures. Engine started well on choke. In the waiting area for the Pembrey practice session; the bikes tick over w

New clothes

Image
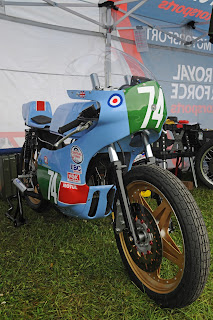
Being a working machine was one thing but there was no arguing that she was the ugly duckling on the Snetterton 16 paddock. It was time for some new clothes. Tank I decided to treat myself to a TZ style race tank from  scooternbikedeals  who was selling at a good price and had 2050 feedback. Unfortunately he was having difficulty with his supplier right up to the point that the 90 days of eBay support ran out and he suddenly forgot how to reply to emails. eBay did its usual shrug and walk away thing and I lost a load of money.  Fuck you  scooternbikedeals . Fairings From Shop to Paint Shop On a brighter note; I had got my mits on some fairings. We had some faf trying various places to see who would do us a deal on a large order of fairings. This turned into finding someone who hadn't sold their entire stock at the Newark bike show! I very nearly bought a Maxton fairing from Bardney racing but the shop owner had wondered off leaving his locked out son (who answer

Bits and bobs

Image
There is no shortage of little bits and bobs to do. Some are new, far too many are bits that dropped off or misbehave. Bobbins and friends Rear paddock stand bobbins have been sat in my RD250 parts box for a few months. I just didn't fancy welding nuts to my swing arm that was all. But I finally got that low on jobs and that fed up with the damage I was doing to my new shock bottoms, I ended up deciding to fit them. A suitable position was found and marked on the swing arm so I knew where the nuts would need to be welded on. To weld these nuts on I had to remove all of my electrics or remove my swing arm. So off came my swing arm, a surprisingly easy job to do. With the swing arm on my bench: I removed paint from the area I would weld and carefully tiged the nuts on. I had to take care as the nut would happily melt at 20 Amps but the swing arm needed more like 60. As such I heated the swing arm and carefully rocked up to the nut working plenty of rod in to real

Winding the clocks back with a beefier bracket

Image
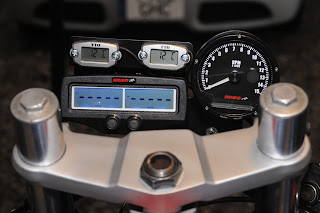
I liked my clock bracket but it clearly didn't want to hang around... Before I even hit the track: I didn't get to fit my EGT sensors so I removed the display as unneeded weight. On the practice run round Snetterton my tacho did not work and was head banging badly. It wasn't going to hang around and was surving no purpose so off it came too. By the end of the weekend the TTO section of the bracket was cracked half way across and leaving the old, thin, aluminium bracket looking very sad, after one race meet. New bracket time I decided on a steel box section bracket with the rather drastic approach of welding the existing factory tacho bracket directly to it. Due to its in built dampening, this would still provide the gauge with protection whilst bracing things much more firmly than the standard single bottom bolt. This put a lot of faith in my welding skills but things have moved on a bit and I'm not doing too badly at it now. I only welded the

Going back to ignition

Image
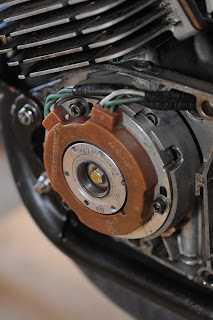
Two things happened: My ignition didn't want to talk to my tachometer, Then my ignition decided to remove itself from my bike altogether, It was time for a new ignition. After the last round at Snetterton when the bracket you see on the left decided to suck and fall of, I was facing the dilemma of: Fix it with a new (and stronger) bracket, or replace the ignition system all together. Fixing would be fairly easy, I like the Femsa ignition for its classic design, very strong spark and so far reliability. But what if this happened again? The Femsa is old so how long could I expect it to last for anyway? And I'd like that shiny new tacho to work, which it didn't with the Femsa ignition? Well I did want a working tacho and took this as an opportunity to upgrade.  A couple of days later I was a few hundred quid lighter and had a new hpi ignition to play with. Everything was less bulky and obviously separate; so more like a modern bik

Tacho, tacho

Image
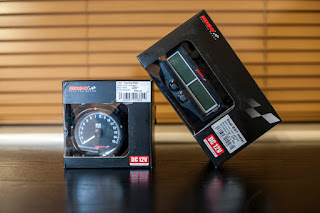
Knowing what is going on with your engine is useful to know for diagnosis purposes as well as for how hard you can get away with pushing it on the track. With the addition of these new Koso EGT, tacho and a pair of TTO cylinder head temperature gauges, I will be well in the know at all times! *Spoiler*  By all means read this blog, it is interesting after all (I hope), but I wouldn't plan a build of your own based too closely on this bracket design. Maybe try this on . Mounting Much time was spent offering up different gauges in a variety of configurations to see what would work best, not only to look good, but to fit in the space I have available and present the information to me in a simple easy to read manner. All very important when buzzing round the track like a loon. I decided early on that I wanted all of the gauge faces on the same level. This would be tricky as each gauge was of a different depth. I decided to try making a backing plate out of thin sheet