Loosing my Head[stock]

The standard RD250-B 34mm forks were skinny and had the caliper in the wrong place.
It's time to rectify that...

An FZR400 1WG set of forks and yolks appeared from that magical place known as eBay. This was later followed by an axle making for a complete 38mm front end for the little RD.
Condition wise the the fork bottoms were okay, stanchions weren't overly pitted with the only rough bit being the bottom yolk that quickly cleaned up in a sand blasting cabinet.
because nothing is ever easy; the forks and head stock stem are both too long for the RD so would both need trimming.
The beauty of using an FZR400 1WG front end is that the head stock stem is the same diameter as the RD's so you can use the same taper bearings which makes life easier. But only easier. This job really isn't for the faint hearted. Unless you have an Andy.
I had an Andy.
There are two ways to skin this cat:
- One is to press out the stem then, using a lathe, cut the stem down at the thin end. In doing so you need to recut the bearing machined surface and threads for the lock and top nuts.
- The second one and arguably easier, is to cut the stem down in the middle, take a lump off and them weld it all back together.

The second idea sounds terrible. Cutting your head stock stem should always be avoided knowing the sickening consequences of a failure here.
So naturally that it the option I went with. This was largely governed by the lack of a press and the presence of a hack saw and mig welder in the garage I was in.

 The welding was superb (not done by me) and somehow the stem was still straight so things were going very well.
I knew I might have some work coming with regards to steering stops but chose to leave this for now.
The new bearings from the stock front end were recovered, cleaned and fitted to the new stem. I tightened the front end down with one locking nut rather than the pair to reduce the height of the top yolk.

I chose to tidy this up by removing them with a hack saw, jig saw, grinder, files and sand paper.
Once the offending items were removed with the saws I ground everything down till it was flush and flat. I then rounded off all of the corners and edges along with a general tidy up of any untidy seams that Yamaha had left during manufacture using the grinder.

When I was happy with the shape and that any straight lines were indeed straight, I brushed everything down with an 80 grit sanding disk to remove any imperfections left by keys and wayward hammers.
To finish I used a 180 grit emery cloth to leave a brushed finish in the surface before cleaning and painting in aluminium finish paint.

The now rather fly looking triple trees were planted in place, capped off with an open topped nut to remove any limitations that a dome nut may present with a custom build like this.
The forks were slid in along with a pair of new black CNC clip ons.
The top and bottom clamp bolts got a light clean, something I will do properly another time, and stuck in place to make sure the forks did the same.

Not bad eh?
I will cut the forks down another time. In the mean time new seals, oil and some Hagon springs will see me through till the opportunity arrives.
The steering lock needed beefing up as the bottom yolk posts did not impact the welded on lump stuck to the front of the headstock. Aforementioned Andy chucked me a long nut that I could weld on the front of the headstock and stick bolts in. This would give me a nice adjustable steering lock.
All I needed was a welder...

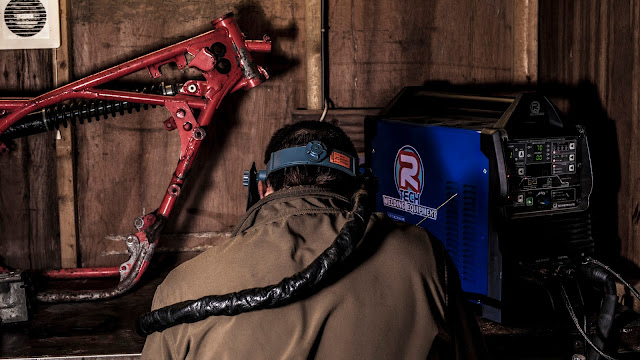
A few phone calls and emails later and I was sponsored by R-tech welding. No really!
I will talk more on them later but I now had one of their rather nice Digital 170 Amp AC/DC Tig welders and a load of supporting equipment.
I spent most of an afternoon blowing holes in sheet metal and welding my torch to stuff before I was willing to give welding my bike a go.
Off came the ignition and head stock and in I went with the welder.
As a self taught (in an afternoon) novice welder, I was fairly happy with the result. Welding a relatively thin nut to a thick headstock isn't the easiest, especially for a learner but it came out okay.
Either way I don't think it is coming off too soon!
A bolt and nut finished off to make for a good lock. Another big job down.


Comments
Post a Comment