New clothes

Being a working machine was one thing but there was no arguing that she was the ugly duckling on the Snetterton 16 paddock. It was time for some new clothes.
Tank
I decided to treat myself to a TZ style race tank from scooternbikedeals who was selling at a good price and had 2050 feedback. Unfortunately he was having difficulty with his supplier right up to the point that the 90 days of eBay support ran out and he suddenly forgot how to reply to emails. eBay did its usual shrug and walk away thing and I lost a load of money.
Fuck you scooternbikedeals.
Fairings
From Shop to Paint Shop

On a brighter note; I had got my mits on some fairings.
We had some faf trying various places to see who would do us a deal on a large order of fairings. This turned into finding someone who hadn't sold their entire stock at the Newark bike show!
I very nearly bought a Maxton fairing from Bardney racing but the shop owner had wondered off leaving his locked out son (who answered the phone) to apologies. This had me moving on to Sforza racing who were racing themselves to replenish their stocks. I decided on a TZ250 G fairing and screen as I had become somewhat attached to my wedge tail unit and the slightly more modern looks tended towards my 90's bike riding youth.

I had already left my standard tank and G tail unit to be collected for painting so all I had to do was come home and pick up the freshly painted bits.

As you can see we had left no shortage of work to do for the poor painter apprentice who got lumbered with this job.
Suffice to say he was sick of the sight of motorcycle fairings by the end of it all!
The guys left their workshop laidened with fairings and a few packets of biscuits lighter (It's the only currency they accept!) and not long after I had my share cluttering up the garage in constant danger of getting damaged at any moment.
Shortly after this I managed to pick up a second hand Maxton tail unit complete with leather seat pad for £16 It was too late to be painted but could well provide a nice spare tail as well as possibly donating the seat to my new tail unit.
Fairing fitting
Tail

With time lines now blurring and jobs crossing over each other I was hitting the fairings as and when the opportunity arose.
The tail unit and tank were offered up proving that the seat pad wouldn't fit due to the C/D/E tail unit having a hump which interfered with the seat and that various brackets were getting in the way as well.
A few minutes with an angle grinder followed by a tin of mat black later left my frame lighter and the tail unit still looking a bit perched.
I made a bracket up to align the bolt holes on the fairing to the ones on the frame. This helped the tail unit not fall off but more fasteners would be needed in the rear to make that a long term partnership.
This was sorted with a pair of M8 anchor nuts, some dome head bolts, a grinder and a drill.
I will one day come back to this and maybe build a better subframe but that can wait for another day.

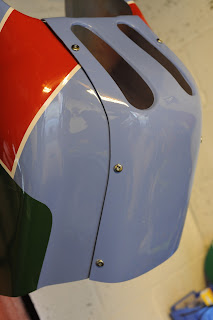
The belly pan also had witness marks where holes had been but these were wrong. I picked up my own holes from my fairing and drilled them out to take the fasteners.
The fasteners are held in place with nylon washers when they are not secured.
Once these were all located I did a test fit.
I thought the 15mm grip length was a bit long at first. Later fitting showed everything was pretty solid however.
Speaking of strength; the belly pan makes the whole fairing much stronger which is otherwise very flexible.
I left the T piece out for a while as I wasn't sure if I would fit it or not. Towards the end of this job I decided to sling it on and was glad I did as it does look better with it. The process was the same as the belly pan so I wont boar you.
 Somewhat unsurprisingly the fit wan't great when it came to offering up the fairing to the bike.
The exhaust hangs too low tilting the fairing down which not only looks a bit daft but it also impacts the handle bars.
Things were tacked together for a photoshoot before a better effort was made a while later. During this effort one of the original fairing stays snapped off. The brazing holding them together wasn't up to the job it seemed. Another job to do.


Back in the garage; exhausts were dragged up into the frame to make as much clearance as I could and the front fairing rear brackets were repaired.
Unfortunately time was short for Snetterton 17 so I ended up running the bike naked. Back on went my number board from 2016 and the fairing went on my garage wall for the time being.
A few minutes with an angle grinder followed by a tin of mat black later left my frame lighter and the tail unit still looking a bit perched.
I made a bracket up to align the bolt holes on the fairing to the ones on the frame. This helped the tail unit not fall off but more fasteners would be needed in the rear to make that a long term partnership.
This was sorted with a pair of M8 anchor nuts, some dome head bolts, a grinder and a drill.
I will one day come back to this and maybe build a better subframe but that can wait for another day.
Forward fairing
I had been warned that the forward fairing was a pain in the backside to fit well.


I didn't want to start the front fairing till I had the engine and exhausts fitted so I knew I would have clearance.
When I had a slack few minutes and some Dzus fasteners in my hand; I did get to work on the belly pan however.
When I had a slack few minutes and some Dzus fasteners in my hand; I did get to work on the belly pan however.
The fairings had marks where the original [that this fairing was molded from] had Dzus fasteners previously so I picked up the hole positions on the fairing using those.
I then lined up the base plate with the hole locations and marked the holes with a pen.
5 minutes with a drill later and I was ready to get riveting.
The belly pan also had witness marks where holes had been but these were wrong. I picked up my own holes from my fairing and drilled them out to take the fasteners.
The fasteners are held in place with nylon washers when they are not secured.
Once these were all located I did a test fit.
I thought the 15mm grip length was a bit long at first. Later fitting showed everything was pretty solid however.
Speaking of strength; the belly pan makes the whole fairing much stronger which is otherwise very flexible.
I left the T piece out for a while as I wasn't sure if I would fit it or not. Towards the end of this job I decided to sling it on and was glad I did as it does look better with it. The process was the same as the belly pan so I wont boar you.
 Somewhat unsurprisingly the fit wan't great when it came to offering up the fairing to the bike.
The exhaust hangs too low tilting the fairing down which not only looks a bit daft but it also impacts the handle bars.
Things were tacked together for a photoshoot before a better effort was made a while later. During this effort one of the original fairing stays snapped off. The brazing holding them together wasn't up to the job it seemed. Another job to do.


Back in the garage; exhausts were dragged up into the frame to make as much clearance as I could and the front fairing rear brackets were repaired.
Unfortunately time was short for Snetterton 17 so I ended up running the bike naked. Back on went my number board from 2016 and the fairing went on my garage wall for the time being.
Screen bracket
Back in the garage post Snetterton and I was back into fairing fitting.
The screen and the upper fairing is supported by a fairing bracket on the TZ and I was going to need to make myself one.
One of the racing team members, Andy, had shown me some neat aluminium end fittings he had made on a lathe and suggested I made some of my own then a simple bar could be used between them and the top nut of my head stock.
Lacking a lathe and not wanting to endlessly pester him for the use of his tooling, I made my own out of some scrap bar and a hand drill.
I drilled and tapped holes for some M6 button head screws in one end and made a 13mm[ish] hole to match some 13mm steel bar I had picked up from a blacksmith in Heckington. Hand drills aren't famed for drilling straight holes and my work didn't disappoint but they were close enough. Obviously a 13mm drill bit would have helped, which I didn't have, so the holes were coaxed open from 10mm with a dremel.
Yer not the best but what an example of "can do"? no? I need a lathe.
The bracket itself was cut to length from the 13mm steel bar (which with a bendy fairing is rather open to interpretation) and its centre found.
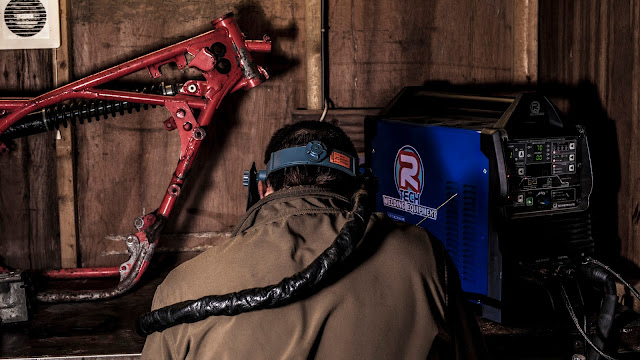
I then made an L shaped bracket from 1.5mm steel sheet and welded it it the centre of the bar.
A 6mm hole was then drilled in the plate and a corresponding threaded hole was drilled in the top of a dome nut. As the dome nut did not provide much depth for threading I ended up welding an M6 nut on top of the dome nut (nuts I know).
This could now be assembled using an M6 bolt that has a very short unthreaded length so that when the bolt was torqued down, the fairing bracket would not turn with the headstock top nut. Simple but clever, obviously not my idea.
With everything assembled I picked up some locking holes for the aluminium end fittings to stop the bar (which was also drilled) popping out.
Once I was happy that everything was working as it should I ripped it all off to paint the lot black.


The screen was dropped off by Chris from Sforza racing the afternoon before we set off, top guy!
I had already drilled holes in the fairing so I clamped the new screen into place then marked holes for the fairing stay and screen screws with a soldering iron. This both marks the hole and acts a bit like a punch mark would on metal; keeping the drill bit in the right spot as you start to drill.
For drilling I made some acrylic drill bits by taking some regular drill bits and changing their cutting face to 60 degrees. This is supposed to prevent or at least reduce the chance of grabbing.
Before drilling each hole I heated the screen carefully with a heat gun to further reduce the chance of shattering the brittle screen. I then used an electric hand drill to carefully drill out the holes.
With all of the holes drilled out I fitted the screen with rubber well nuts and m4 screws. The first set were cheap crappy eBay jobbies which went straight in the bin. The second lot were cheap good eBay jobbies pinched from the NSR250 box. I'll order more of those!
So there she is all ready to look glam round Pembry circuit. At least she looked good whilst not going much racing anyway, stupid ungrateful bike. We shall save that for another day though shall we.

With everything assembled I picked up some locking holes for the aluminium end fittings to stop the bar (which was also drilled) popping out.
Once I was happy that everything was working as it should I ripped it all off to paint the lot black.


Screen
This left me with a screen to fit. I had rushed to try and fit one for Snetterton and cracked it so this time I was more careful.The screen was dropped off by Chris from Sforza racing the afternoon before we set off, top guy!
I had already drilled holes in the fairing so I clamped the new screen into place then marked holes for the fairing stay and screen screws with a soldering iron. This both marks the hole and acts a bit like a punch mark would on metal; keeping the drill bit in the right spot as you start to drill.
For drilling I made some acrylic drill bits by taking some regular drill bits and changing their cutting face to 60 degrees. This is supposed to prevent or at least reduce the chance of grabbing.
Before drilling each hole I heated the screen carefully with a heat gun to further reduce the chance of shattering the brittle screen. I then used an electric hand drill to carefully drill out the holes.
With all of the holes drilled out I fitted the screen with rubber well nuts and m4 screws. The first set were cheap crappy eBay jobbies which went straight in the bin. The second lot were cheap good eBay jobbies pinched from the NSR250 box. I'll order more of those!
So there she is all ready to look glam round Pembry circuit. At least she looked good whilst not going much racing anyway, stupid ungrateful bike. We shall save that for another day though shall we.


Comments
Post a Comment