Winding the clocks back with a beefier bracket
I liked my clock bracket but it clearly didn't want to hang around...

Before I even hit the track: I didn't get to fit my EGT sensors so I removed the display as unneeded weight.
On the practice run round Snetterton my tacho did not work and was head banging badly. It wasn't going to hang around and was surving no purpose so off it came too.
By the end of the weekend the TTO section of the bracket was cracked half way across and leaving the old, thin, aluminium bracket looking very sad, after one race meet.
New bracket time
 I decided on a steel box section bracket with the rather drastic approach of welding the existing factory tacho bracket directly to it.
Due to its in built dampening, this would still provide the gauge with protection whilst bracing things much more firmly than the standard single bottom bolt.
This put a lot of faith in my welding skills but things have moved on a bit and I'm not doing too badly at it now. I only welded the torch to my work about 8 times I think!
I used the same 20mm box section I had used for the original bracket stay which I then welded my new piece directly too. This was promptly cut straight off and rewelded the right way up (it's okay I don't think anyone noticed...).

I had planned to bolt straight through this box section but I opted instead to go for the more fiddly, but tidier looking, nuts inside the box section look. This is not a moto to live by but in this instance; it was appropriate.

Much how things look pretty now, I went and got the black paint out to stop things getting rusty.
Also because black right?

The TTO gauges were supported with a sheet of carbon fiber.
The sheet was cut down to size with a hacksaw and shaped with files. So long as you take your time and don't use anything too harsh: the carbon fibre board will not split or chip. I finished the edges with sandpaper to keep things smooth.
I took care to wear a mask and gloves as carbon fibers are nasty. I also gave everywhere a good sweep and tidy up after as whats the point in wearing the mask before if you are just going to kick it up later?
The board was then drilled carefully and bolted to the back of the EGT gauge via its bracket with longer M4 bolts which I thread locked before fitting. Fitting this way would ensure that the TTO and EGT gauges would benefit from rubber dampening.
The gauges were then stuck to the board with the foam sticky pads supplied and hole plugs fitted which I had thankfully retained.

Back to the EGT's
I needed to fit the EGT sensors. This was something I was loath to do on my untested TZ exhausts but seeing as I was clearly not going to be fitting new pipes any time soon so I went ahead with it. I could always weld a plug in the future when I get round to making pipes.The EGT sensor probes need to be fitted to the pipe 15cm from the piston skirt. This would place them right where the exhaust spring anchors are which, as I am using the factory jubilee clips supplied with the EGT's, is another ass pain.
Another obstacle, and another reason I did not fit them earlier, was that the probes would be in danger of fowling my belly pan.
 All of these were factors to taker into account when marking up and drilling for these sensors. I really couldn't fudge this so I needed to be very careful.
Once I was happy that nothing was going to get in the way of anything else, I got the drill out and drilled two holes in my already blowing but otherwise perfectly serviceable exhausts.
I had a little faf moving the jubilee clips around to not fowl springs but they eventually went on with a little copper RTV to try and keep leaks down.
Next the probes were pushed into their olives and torqued into their new homes.
The wires are monstrous on these sensors and as they are armored, it isn't straight forward to break into them. The excess got [tidily] stuffed under the tank with the rest of the spare wire from everything else.
Weight isn't an issue on race bikes right?
And where the hell has that exhaust spring gone? Bugger.
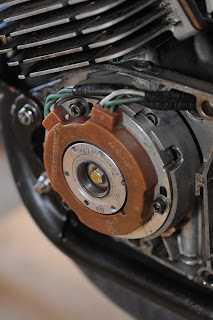
 Finally the wiring was taken care of.
The battery had been moved after the new ignition fit so I needed to extend the wiring anyway. Excessive vibration and stress had broken the soldering on my ignition switch so removing stress would also be important.
I extended the wiring with thicker audio cable and added additional bullet connectors so I could remove the entire clock bracket without needing to remove components individually.
The switch was then mounted in the tacho brackets old mounting bolt hole leaving it out of sight and hard to knock.
Once everything was tightened up into place I then tie wrapped all of the wires to tidy them up but leaving enought slack so nothing was under too much stress.
Closing
The new cluster is very compact and tidy. It probably weighs a fair bit more than the old one but, touch wood, it might last a little longer too.
Oh is that a fairing in this picture?


Comments
Post a Comment