Bits and bobs
There is no shortage of little bits and bobs to do. Some are new, far too many are bits that dropped off or misbehave.
Bobbins and friends
Rear paddock stand bobbins have been sat in my RD250 parts box for a few months. I just didn't fancy welding nuts to my swing arm that was all.
But I finally got that low on jobs and that fed up with the damage I was doing to my new shock bottoms, I ended up deciding to fit them.
A suitable position was found and marked on the swing arm so I knew where the nuts would need to be welded on.
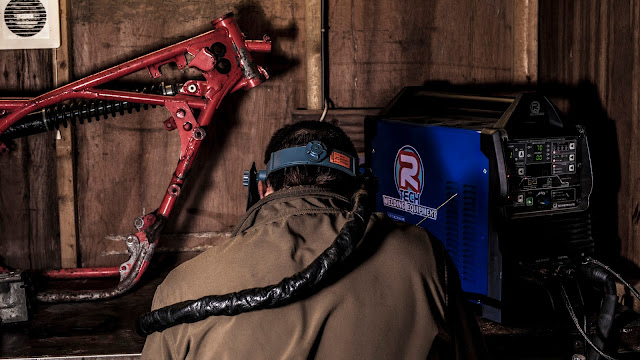
To weld these nuts on I had to remove all of my electrics or remove my swing arm. So off came my swing arm, a surprisingly easy job to do.

 With the swing arm on my bench: I removed paint from the area I would weld and carefully tiged the nuts on. I had to take care as the nut would happily melt at 20 Amps but the swing arm needed more like 60. As such I heated the swing arm and carefully rocked up to the nut working plenty of rod in to really build up some support for these small M6 nuts.
This was done for both sides and a tap run through both nuts to clear any stray weld.
 The swing arm was then dragged outside and painted mat black like the rest of the bike. The only exception to this was the left upper surface of the swing arm which I gave a final coat of gloss to make cleaning easier under the chain.
Finally the bobbins were mounted to their new home. I used a few washers to space them out for clearance and thread locked the bolt to [hopefully] stop the bobbins from vibrating their way off.
Whilst I was there I took the opportunity to sort out the rubber bush on my right Hagon shock. When I fitted it the first time I couldn't get it to sit properly resulting in it getting pinched by the nut. A little time with a heat gun reshaped it and a bit of WD40 before fitting ensured it slipped hope properly this time.
Another benefactor of circumstance was the chain adjusters which got repainted and fresh, longer bolts. I was running out of adjustment on my newly lengthened chain so I wanted to use everything the swing arm would give me. Hopefully when I run out of adjustment I can pop off the extra chain link and start back from the bottom without the wheel rubbing again.
Forks

Well I was clearly stood around with a can of spray paint in my hand and rather than painting a big wang on a bus stop, I decided to tidy up my fork bottoms.
The temperature and relative lack of dust and bugs this April has made for some lovely armature painting conditions.
Prep as usual took up most of the time. I cleaned the legs off which; having only done a couple of races were already fairly clean. Rather than remove the fork leg bottoms I just removed the front wheel, masking taped off the rubber seals and masked off everything else with rags.
An initial rough coat was followed 10 minutes later by a heavier wet coat to give a nice gloss finish.
Not bad for 20 minutes effort. they weren't bad before but now they look really tidy.
Shark fin.

As the last fin was another victim of old welding failure: I decided to use P clips this time. This would add some adjustability should it be needed for different size sprockets and chain lengths which is apparently now a thing.
The replacement sharks fin was fabricated from a sheet of 6mm aluminium with a hacksaw, jigsaw, files and a Dremel.
Holes were picked up to attach to the P clips and the new fin was offered up to the bike.
With everything agreeable I chucked some paint at it and bolted it on.
This one needs to do better than three races.
Challenge on.


Comments
Post a Comment